DMD
More coming soon!
Modification
We used a DLP4710EVM-G2 video projector as spatial light modulator (SLM) in our setup. The dismantling is inspired by this paper.
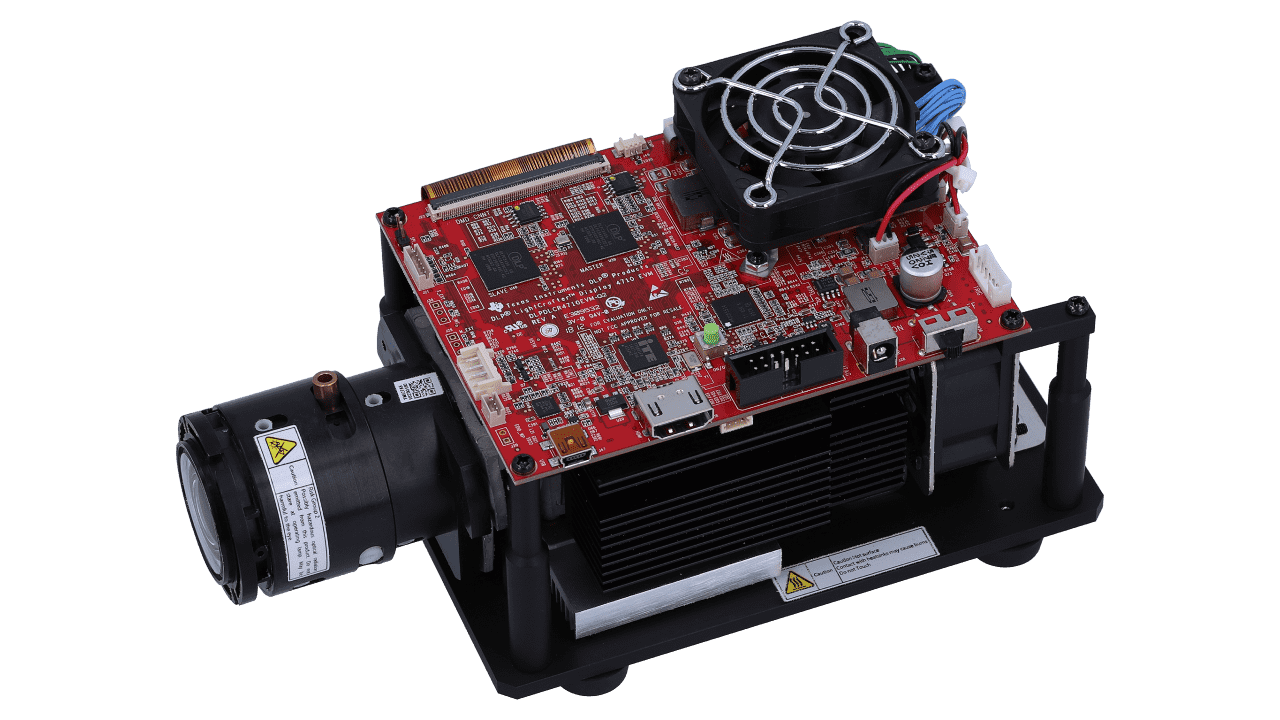
Here is a image how the DLP4710EVM-G2 oringinally looks like. In the projector, what is useful for us is the driver board and DMD chip and its mount. A 3D printed part is used to connect the DMD chip mount with a kinematic mirror mount. A longer flex cable with 40pin/0.5mm pitch is bought separately. The original calbe is quite short and not efficient to mount the driver board away from the DMD.
flash the driver board firmware
When the driver board is switched on, it will check if all LEDs work correctly. We need to deactivate the LEDs in the firmware. Download this software and connect the projecto to computer. Open the software and enter the advanced setting. The firmware accept batch file for modifying the configuration. A batch file is provided here and load it can disable the LEDs and set the input source with HDMI.
steps of tear down the DMD projector
- remove the flex cable and 3 LEDs from the driver board
- loosen 4 screws on the driver board and it can now be taken down from the projector frame
- loosen 4 screws beside the DMD mount, be careful, each screw holds two different springs
- take out the DMD chip and place it onto the 3D printed mount
- place the fixation layers onto the DMD respectively
- tight the screws to hold the DMD chip tight
- reconnect the DMD board with the driver board
Paper
Mitchell A. Cox and Alice V. Drozdov, "Converting a Texas Instruments DLP4710 DLP evaluation module into a spatial light modulator," Appl. Opt. 60, 465-469 (2021)